Tag Archives: organization

The best times to tackle deep cleaning projects

Most people feel motivated to clean and reorganize in the spring. Since most of fall and winter is spent indoors, I prefer to prepare for the long winter hibernation by cleaning, purging, and reorganizing. I’ve been creating a to-do list in my head of things I’ve been putting off all summer, and it got me thinking about how I could make things easier on myself. Is there a most convenient time to tackle the household chores we all dread?

Here are some ideas I’ve come up with. I’d love to hear how you make this stuff easier on yourself.

Clean the refrigerator after vacation.

I tend to be a little OCD about old food in the refrigerator — I throw away uneaten leftovers and expired condiments every week on the night before our trash is picked up so funky food doesn’t hang out in the fridge or our trash can for too long. Giving the fridge a good deep cleaning is a bit more challenging, though, since it’s full of food most of the time. However, right before we leave town for a vacation, I always do a major purge and try to leave the fridge mostly empty so we don’t come home to funky smells. Before restocking at the grocery store when we get home, the first thing I do is take out each shelf and give it a good scrub in warm soapy water, double check condiments and toss anything old or expired, and scrub down the nooks and crannies that aren’t visible when the fridge is stuffed with food.

Clean out the pantry before grocery shopping.

You might be surprised how much food is actually available in your kitchen. Hunt for meal ideas in your canned foods, throw away anything that is no longer edible, and put foods that need to be eaten as soon as possible at the front. Taking stock of your pantry before grocery shopping will also save you some money since you’ll be less likely to buy an item you already have on hand.

Reorganize closets when the seasons change.

Closet space in limited in our 1970s ranch, so we only keep current, in-season clothing in our closets. Out-of-season clothes are stored in giant plastic tubs in the guest room closet. When the weather changes each season, we swap them out. If you follow a system like this one, that seasonal clothing swap is the perfect time to purge things you don’t need and reorganize your space. Take a good hard look at each item before you store it for next season — did you wear it this year at all? If not, it’s probably time to donate it.

For bonus points, use the bedroom closet swap as an excuse to clean and reorganize other closets and cabinets in your house. If you tackle them twice a year, you’ll avoid a huge pile-up that will eventually require heavy-duty cleaning.

Clean your work space on Friday afternoon.

Whether you work from home or in an office, Friday afternoon downtime is the perfect time to purge or file paperwork and clear clutter. If there’s something that will need attention first thing Monday morning, put it front and center on your desk to remind yourself to get right to it after your relaxing weekend.

How do you make deep cleaning projects easier? Please share!
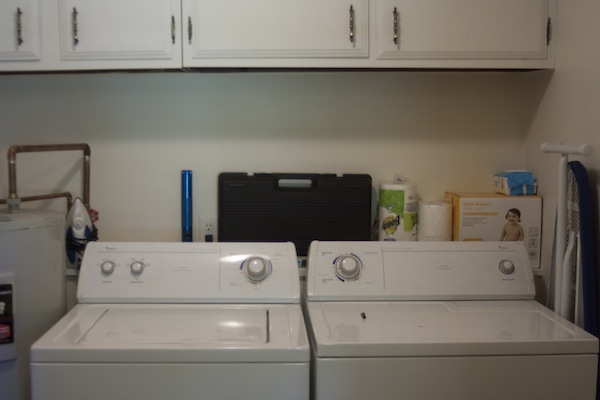
Photo credit

One room at a time challenge – Laundry room

After spending the weekend really thinking about my priorities as far as time management goes, I made the decision that decluttering our space should be close to the top of the list this summer. We keep our living areas pretty tidy (most of the time), but behind closed doors, I’ve let clutter take over. There’s really no excuse for it since we’ve barely lived in this house a year. I shudder to think how bad it will be in 5 years if we don’t start tackling it now.

In a burst of motivation on Sunday, I decided to start with our laundry room. I jumped at the chance to take advantage of it during Judah’s afternoon nap so quickly that I completely forgot to shoot a before picture. It’s not that I’m embarrassed to show you what it looked like (well, I am, but I’m willing to do it). I honestly just forgot. Doh. Rest assured, I will remind myself to snap that before picture for future projects.

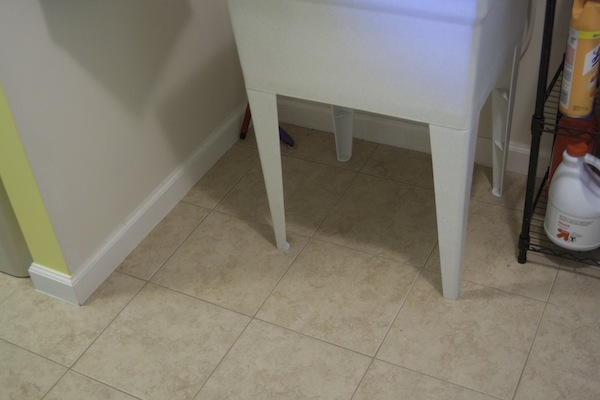
Since it’s a tiny room, it only took me a little over an hour to whip it into shape. While we were in the process of painting our house, we let the shelf behind the washer and dryer turn into a depository for paint supplies. Months later, it was still crammed with paint cans, brushes, and old towels we’d used to clean up. It was crammed so high with junk that it fell over onto the dryer about once a week. So we picked up all the paint supplies, and relegated them to an unused cabinet in the garage.

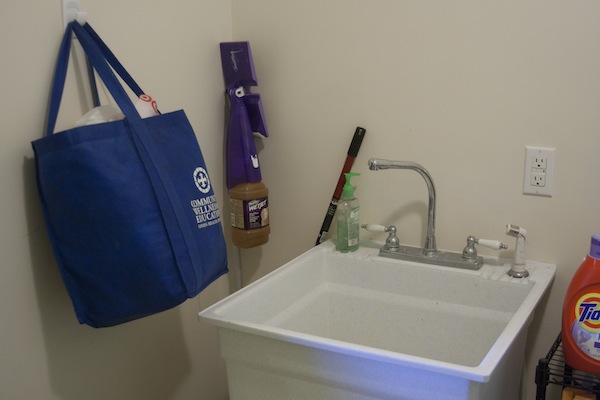
Next to the sink, I’d saved a ton of used plastic bags (they fit our bathroom trash cans perfectly, so we reuse them as garbage bags) as well as some broken down diaper boxes that I was convinced I could repurpose. I recycled most of the diaper boxes and crammed the plastic bags into a reusable bag, which I hung from the hook I used to use for my cloth diaper wet bag. (We switched to disposables full time a few months ago when cloth diapering a toddler just became too gross.)

Speaking of cloth diapering, I still had a laundry basket full of diapers taking up space in the laundry room. Since I plan to use them again someday when Judah has a little brother or sister, I packed them up in a couple of those diaper boxes and packed them away in storage.

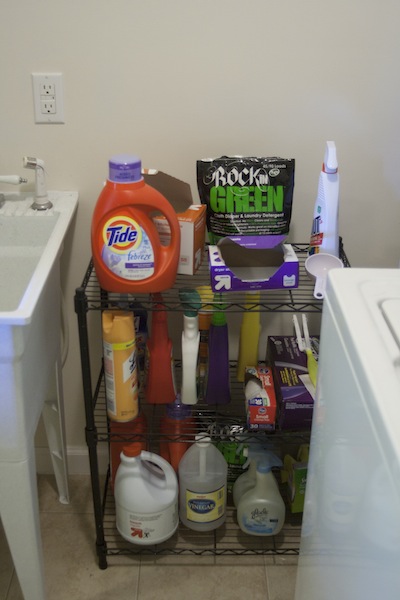
I also gave the shelf we use for cleaning supplies some attention. Everything was stuffed on there with no method to the madness, and there were more than a few empty bottles even. So I rinsed and tossed the empty bottles into the recycling bin, and then organized the shelves — laundry stuff on top since we use it most, cleaning supplies in the middle, and rarely used or bulky items on the bottom shelf. It’s much easy to find what I need now.

The laundry room is between the kitchen and the den. Both the laundry room and the den are blocked by a gate, so Judah can’t get back there for now. I hate that the laundry room is open to view, though. Since we moved in, I’ve wanted to hang a curtain across the doorway to make our laundry room a little more private. Since this little reorganization cost $0, I finally went ahead and picked up the curtain and rod. It’s just a $20 curtain panel secured to the doorway with a $5 tension rod (it’s actually a shower curtain rod). I’m pretty happy with how it separates the utility room from the den and keeps our “dirty laundry” out of view — especially since it cost only $25.

Is there a room that’s been driving you nuts? There’s no better time to tackle it than today! This whole endeavor only took a little over an hour. I’m kicking myself for not doing it sooner, especially since it’s was so cheap and easy. Sometimes all a room needs is a little spiffing up, and it feels like a whole new space.

Spring fever

I’ve been struggling with the adjustment now that I’m a “working mom.” Aren’t we all “working moms,” though? Whether you chase your kids around all day or clock in at an office, being a mom is hard work.

My classes started at the beginning of March, so now I’m balancing my responsibilities at home with responsibilities to my students. I’m still so thankful to have the opportunity to earn income and still “stay at home” with my son for most of the day, but that means I do a lot of my work at home. Trying to work with an active toddler running around presents its own challenges. The only time I can “work” is when he’s sleeping — during his short afternoon nap, and then after bedtime.

Unfortunately, the time change pushed his bedtime back to 8:30 p.m. (Grumble, grumble.) Squeezing all of my extra class work into my busy days has taken some adjustment — which is why this blog has been a little quiet lately.

It doesn’t help that just as I’ve become busier, we’re entering the season when I feel the urge to be most productive. This time of year is when I come out of my winter haze and start noticing all the places around the house that need to be scrubbed, organized, and decluttered. Add to that the three rooms we still need to paint and all of the decorating things I want to do (we’ve been in the house almost a year, and there’s still nothing on the walls), and I’ve got a pretty unreasonable to-do list on my hands.

Right now, I’m working on taking my own advice. I’m breaking my to-do list into pieces and prioritizing. If I can take it one thing at a time, I might finish everything I want to do by the end of … the decade? The century? I’d love to finish by the end of summer, but that’s probably a pipe dream.

Since my list includes tasks in pretty much every room of the house, I’m breaking it down by room. Our plan is to work on one room at a time cleaning, organizing, decluttering, and decorating. I won’t bore you with the point-by-point breakdown of what we need to do — it’s ridiculous. I will say, however, that when I think about it one room at a time, I feel significantly less overwhelmed. I think if I can focus on just the to-do list for a room at a time, it’ll be easier for me to keep track and stay motivated. I plan to share with you what we accomplish as we work on each room.

I’m still deciding where I want to get started, but at this point, I’m leaning toward starting in Judah’s room. Before he was born, my nesting instinct was in overdrive, and everything was neat and tidy and in its place. Now? It is overrun with toys and clothing, and the bottom drawer of his dresser is so broken it’s no longer functional. I feel a knot in my stomach every time I fold his laundry, because I know I’m going to have to wrestle with that stupid drawer. The closer he gets to climbing out of his crib, the more nervous I feel about having a heavy, full-sized dresser in his room, so I’m looking for an alternative method to store his clothes.

What’s on your to-do list this spring? I’d love to hear how you’re tackling your spring cleaning and organization lists!


Simplify your menu

Menu planning is one of those things I take for granted now. For as long as Tony and I have been together, I have always sat down and written out meals for each day of the week, and then shopped based on that meal plan. It wasn’t always this way for me. In college, when I lived with a roommate and planned most of my meals for myself, I didn’t really plan at all. I went to the grocery store, picked up whatever looked good, spent way too much money for one person, and felt like I had nothing to eat two days later. I don’t even remember what that’s like now, but it sounds like chaos!

Even if you’re single, menu planning is crucial if you want to eat healthy and frugally. Poor planning is one of the main reasons people end up spending money on unhealthy food at a drive-thru in the middle of the week. Either that, or you end up like me in college with a cart full of expensive food and “nothing to eat.”

There is most certainly room in the menu plan for eating out if you like, but the point is to plan for it. Know when you’re eating at home, what you’re eating, and when you want to go out for dinner.

Here’s my simple menu planning system. Feel free to share your ideas in the comments!

Start with the sale ad for your local grocery stores.

If you get a Sunday paper, chances are the ads are included. If not, check the grocery store’s website. Our local stores are Kroger and Meijer, and both stores offer easy online access to their weekly sales ads. I pull them up and look for deals that pop out at me and inspire menu ideas. Meats, cheeses, and produce items can all inspire menu ideas. If beef is on sale, I’ll make spaghetti with meat sauce. If chicken is on sale, I plan for chicken dishes and stock up my freezer. If cheese is on sale, it’s homemade mac and cheese or broccoli cheddar soup. Not only does buying what’s on sale save money, but it can make coming up with meal ideas easier if you’re inspired by the sale items.

Plan around your weekly schedule.

I always keep my weekly schedule handy when I’m planning meals for the week. If it’s going to be a busy day, I plan an easy meal. For laid back days, I may plan to try something new and a little more complex. This also prevents me from planning a meal for a night that we have dinner plans. If your menu works with your schedule, you’re more likely to stick to it instead of abandoning the plan for pizza.

Keep a list of tried and true favorites.

Even though there are some dishes we’ve been cooking forever, I always seem to get a form of writer’s block when it’s time to plan the menu. To combat this, I keep a list of our favorite dishes saved on my computer with links to the recipes. Some simple meals get repeated a lot (homemade pizza, burritos, roasted chicken, and grilled cheese sandwiches, for example). Some are reserved only for special occasions (like my mom’s delicious but labor-intensive lasagna). Keeping the list handy makes it easy for me to write a quick and dirty menu if need be.

The Internet is your best friend.

I am not exaggerating when I say that every time I plan a menu, I marvel at how people did this before the Internet. I guess that’s what all those cookbooks collecting dust on my bookshelf were for? Sites like AllRecipes, Food Network, and Pinterest make it incredibly easy for me to search for meal ideas and try new things.

I must confess that Pinterest (follow me here) has replaced all other recipe sites for me in the past few months, though. I have separate boards for Main Dishes, Crock Pot Meals, Side Dishes, Snacks, and Desserts. Every time I see something that looks good, I pin it on the appropriate board. I also pin recipes I see around the web on my own boards. When I’m looking for ideas, I just have to scroll through the Main Dishes board.

A word of advice: I see lots of people splitting their food boards into incredibly specific categories — soups, sandwiches, entrees, etc. I don’t recommend doing it that way. One board with all of your dinner ideas makes it easier to scroll through without clicking around to several different boards and looking for what you need.

Share the menu with the whole family.

Since my husband and I are currently the only family members who get a vote, I always email the menu to my husband right after I finish planning it. I also write it on a dry erase board that hangs in our kitchen for easy reference. This may seem redundant, but you would be amazed how often we completely forget the menu we just planned within minutes of returning from the grocery store. Displaying the menu lets everyone know what you’re eating and when, and serves as a reminder when you need to thaw the meat or begin preparing dinner earlier for more complex meals.

When all else fails, eat leftovers.

If money is tight or you’re struggling to come up with a meal, leftovers night is a great way to clean out the fridge without emptying your wallet (heh, see what I did there?). Let’s be real, though: leftovers night is also a great excuse to order a pizza.

Photo credit

Quick and easy ways to feel less cluttered

It seems like I’m always battling clutter of some kind. Papers stacked up on the table and desks; boxes of stuff I’ve been meaning to sell or donate for months; junk mail; random things that don’t have a place, so they just sit out in the open driving me nuts. When my environment is cluttered, even simple tasks can feel overwhelming. With the holidays fast approaching, I’m craving some peace and tranquility. So I’ve been working on getting the worst of my clutter under control.

Here are a few problems I’m looking to solve. Some of them are easy — I just have to motivate myself to do it already. Some of them require some creativity, and I’d love to hear your suggestions.

Get paper clutter under control.

I think most of us struggle with paper clutter to some degree, but our problem is pretty extreme. At any given time, my English professor husband is buried under 50-200 student essays and papers. When they overrun his desk, they end up on the kitchen table, the coffee table, and even the living room floor.

Thankfully, he’s mindful of how crazy this drives me, so he only scatters essays when he’s in the process of grading them, and he puts them away when he takes a break. But with so much necessary paper around, I feel more sensitive about the unnecessary paper. Junk mail, old bills, coupons, magazines, and other junk stack up and make everything seem less tidy. Here are a few strategies I’m trying to employ to get it under control:

  • Deal with junk mail immediately. It’s easier said than done, but I need to start sorting mail immediately when it comes into the house and putting junk straight into the recycling bin. I have enough paper to sort without making things worse by keeping junk around.
  • Create a paper sorting station. As much as I hate it, there is a certain amount of paper I have to keep around at least for a while. I need some sort of solution for sorting and organizing it so I can keep it off my kitchen table. I’ve seen lots of options on Pinterest, and I’m trying to figure out the best way to handle it. If I keep things sorted, it will make it less complicated to organize it and keep it under control.
  • Go paperless when possible. I pay all of my bills online, and I don’t have any real use for paper bills. Just like the marketing emails, I need to be proactive about eliminating this paper clutter completely. In the coming weeks, I’m going to start signing up for paperless billing for every bill I possibly can.

Unsubscribe from marketing emails.

Judah is almost one year old, and I still receive annoying pregnancy-related newsletters in my email inbox. I also receive newsletters for stores where I have no interest in shopping. It’s overwhelming to wake up to 50 new email messages, and 45 of them are junk. Plus I’m always afraid I’m going to miss something important, because it’s buried in the junk. I’m resolving to hit “unsubscribe” on marketing mail that doesn’t interest me rather than just putting it off by deleting it.

Tidy up.

I’ve gotten a lot better about this in the past few weeks, and it’s done wonders for my sanity. I deep clean the house once a week, and I take a few minutes three times a day to keep it tidy. It’s simple enough to walk through the house and put things where they belong a few times a day, and it makes the house feel clean throughout the week even though I don’t have time to clean intensively. I also do the dishes three times a day instead of once in the evening, which seems to help me feel more organized.

Just do it.

We have things laying around the house that we’ve been planning to do something about for months or even years. There are items that we’ve moved three or four times that we never use. Every time I see them, I think, “I need to donate or sell that.” But then it gets shoved into a closet or under a bed, and I put off dealing with it for another 6 months. I need to suck it up and take care of that stuff already. All it does is take up space.

What strategies do you use for conquering clutter?

Photo credit

Simple ways to feel more organized

When Judah started bebopping all over the house a couple months ago, I felt like I lost a good chunk of useable time during the day. He suddenly started sleeping less, and he wanted to be moving constantly — which means I have to watch and chase him constantly. It’s hard to get anything done when he’s awake.

I’m not ashamed to admit that housework took a backseat. My to-do list took a backseat. And yes, this blog has taken a backseat. Eep.

I’m working on getting it together, though, and there are a few things I’ve implemented to make me feel and seem more organized — even on the days when I’m anything but.

Create a daily routine, and try to stick to it.

Things seem to go more smoothly when Judah and I stick to a basic routine. Play time, meals, naps, errands, and chores are all penciled into our day at roughly the same times every day, so we both know what to expect. Judah seems happier when we’re on a schedule, and I feel like I get more done when I adhere to a routine. There’s room for variation, but certain constants keep us running on schedule.

Keep things tidy.

Housework is one of the first things to fall to the back burner when I’m pressed for time, but a messy house makes me feel even more chaotic. For the past couple weeks, I’ve been cleaning a little every day instead of doing major cleaning on the weekends. By keeping our living areas (the kitchen, living room, and dining room) tidy, I just feel better and more organized. It also leaves more time for relaxation on the weekends. This same principle can be applied to your work space. Keeping your desk tidy will help you feel more focused and productive.

Schedule some downtime.

No matter how hectic things are, I try to reserve Judah’s morning nap time for quiet time for myself. I read, blog, email, or sometimes even nap during that time if we had a particularly rough night (ahem, teething). Taking an hour to myself every day helps me recharge and feel more focused so I can be more productive throughout the day.

Write it down.

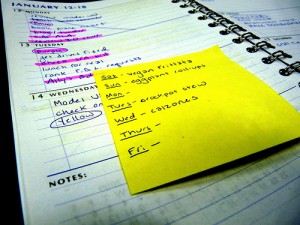
I rely on my iPhone for pretty much everything. Appointments, reminders, and other odds and ends are programmed into my calendar, and I receive an alert to remind me of things. I would probably lose my head if it wasn’t attached to my body, so these reminders are crucial to keep me from missing important dates and appointments. If you prefer pen and paper, a planner or calendar can do the same job.

Know when to quit.

Sometimes after I finally get Judah to bed, I want to keep going and finish what’s left on my to-do list, but I know I’m too drained. When you hit a wall, tackle the last crucial things, but leave odds and ends that can wait until tomorrow. If you push yourself too hard, you’ll spend every day feeling exhausted, and it’ll lower your overall productivity. Instead allow yourself to quit when you know you’ve had enough. You’ll start the next day with more energy, and hopefully that’ll give you the bump you need to finish what you didn’t get to the day before.

What tricks do you use to fake it when you’re feeling unorganized?

Photo credit

Our method for digital photo organization

photographerBack in the days of film cameras, I always thought it was such a waste when I developed my film and half of it was taken up with bad photos. For every great shot there are 5 photos that are blurry, poorly framed, or just not as good as you thought they’d be, especially when you’re photographing kids and pets.

Digital cameras have made it easy to take hundreds of photos and pick and choose the best shots. It’s made amateur photography more accessible. However, it can also clutter your hard drive if you can’t let go of bad photos. Like anything else, if you don’t have a system in place for organizing them, digital photos can become a big headache.

I used to be one of those people that never deleted digital images. I just dumped them all on my hard drive. Now that we have a camera that shoots huge images, we have to be pickier about which images we keep to conserve space on our hard drive.

Here’s how we’ve been choosing and organizing images:

Look at each photo with another set of eyes.

I take most of the photos with our camera, so Tony and I sit down together and quickly go through each photo. If either of us likes the photo, we keep it. Most of the images deleted at this point are just plain bad photos.

Choose between similar images.

Sometimes when I’m trying to get a particular shot, I’ll take five or six similar photos. I used to keep all of them, but now Tony and I go through and choose the best. There’s no reason to quadruple the disc space you’re using with photos that are essentially identical.

Use a practical file system that works for you.

My old camera automatically uploaded images into files and folders by date. This new camera doesn’t. To make it easier on myself, all new photos are dumped into a folder called “New.” From there I delete anything I don’t want to keep, and I manually move the files into folders by date and event.

There are folders for each year and each month within that year. Within the month folders are separate folders for significant events, like “Graduation” or “Honeymoon.” If there is no significant event associated with the photos, then the folder is just named by a date.

This system has made it easy for us to find images quickly. Since I started manually moving images into the folders, it’s also made it easier for me to weed out throw-away photos to conserve space.

Invest in an external hard drive for back ups and archives.

You can get a pretty decent sized external hard drive for about $50 or $60. Ours is 120GB, and we paid $60 for it. We back up all of our photos on this hard drive as well as important documents from our computers. Eventually as our digital photo collection grows, we’ll probably invest in a larger hard drive for archives. This is an essential investment if you take digital photos. It’s like keeping digital negatives. Don’t let a computer malfunction erase all your memories!

How do you manage your digital photos?

Photo by bigtallguy