Category Archives: Cooking

Menu Plan Monday & Grocery Round Up – 10/25-10/31

We really tried to keep our grocery costs to a minimum this week. As we approach the end of the month, it’s looking like we’re going to be a bit over budget, mostly due to some meals out when we were traveling the first weekend in October. We tried to minimize the overage by keeping costs low this final week in the month.

Overall we did really well. Our total was about $56, but then the cashier informed me that I had earned enough rewards points to take an additional $5 off my total. I don’t completely understand their rewards program yet, but $5 off sounded great to me, especially this week. So our actual total was $51. That should help us stick closer to our budget.

And now for this week’s menu plan. We’re craving hearty fall foods since the weather has finally cooled off.

Sunday: Chicken and dumplings
Monday: Spinach pesto & angel hair pasta (We’re just going to serve the pesto over pasta instead of serving it over chicken as the recipe suggests)
Tuesday: Sandwiches/leftovers
Wednesday: Three-bean vegetarian chili
Thursday: Baked potatoes with broccoli and cheese
Friday: Homemade pizza

We can’t wait to try out our new knives tonight when we’re chopping all the veggies for the chicken and dumplings!

Check out more menu plans at OrgJunkie!

Menu Plan Monday & Grocery Round up: 10/18-10/24

This week was not so great on the grocery budget. We ended up at the high side of our budget limit at $60.

We had to stock up on some monthly necessities. We’re also out of chicken stock just as soup season has begun, which means we need to roast a whole chicken this week to make some stock.

We ended up picking up two whole chickens at Costco essentially for the price of one. We’ll use one for dinner and chicken stock tonight, and freeze the other for later. Buying two drove up our costs for this week, but it was ultimately a better buy. We cook a lot of soup in the colder months. Next time we need stock, we won’t have to buy another chicken.

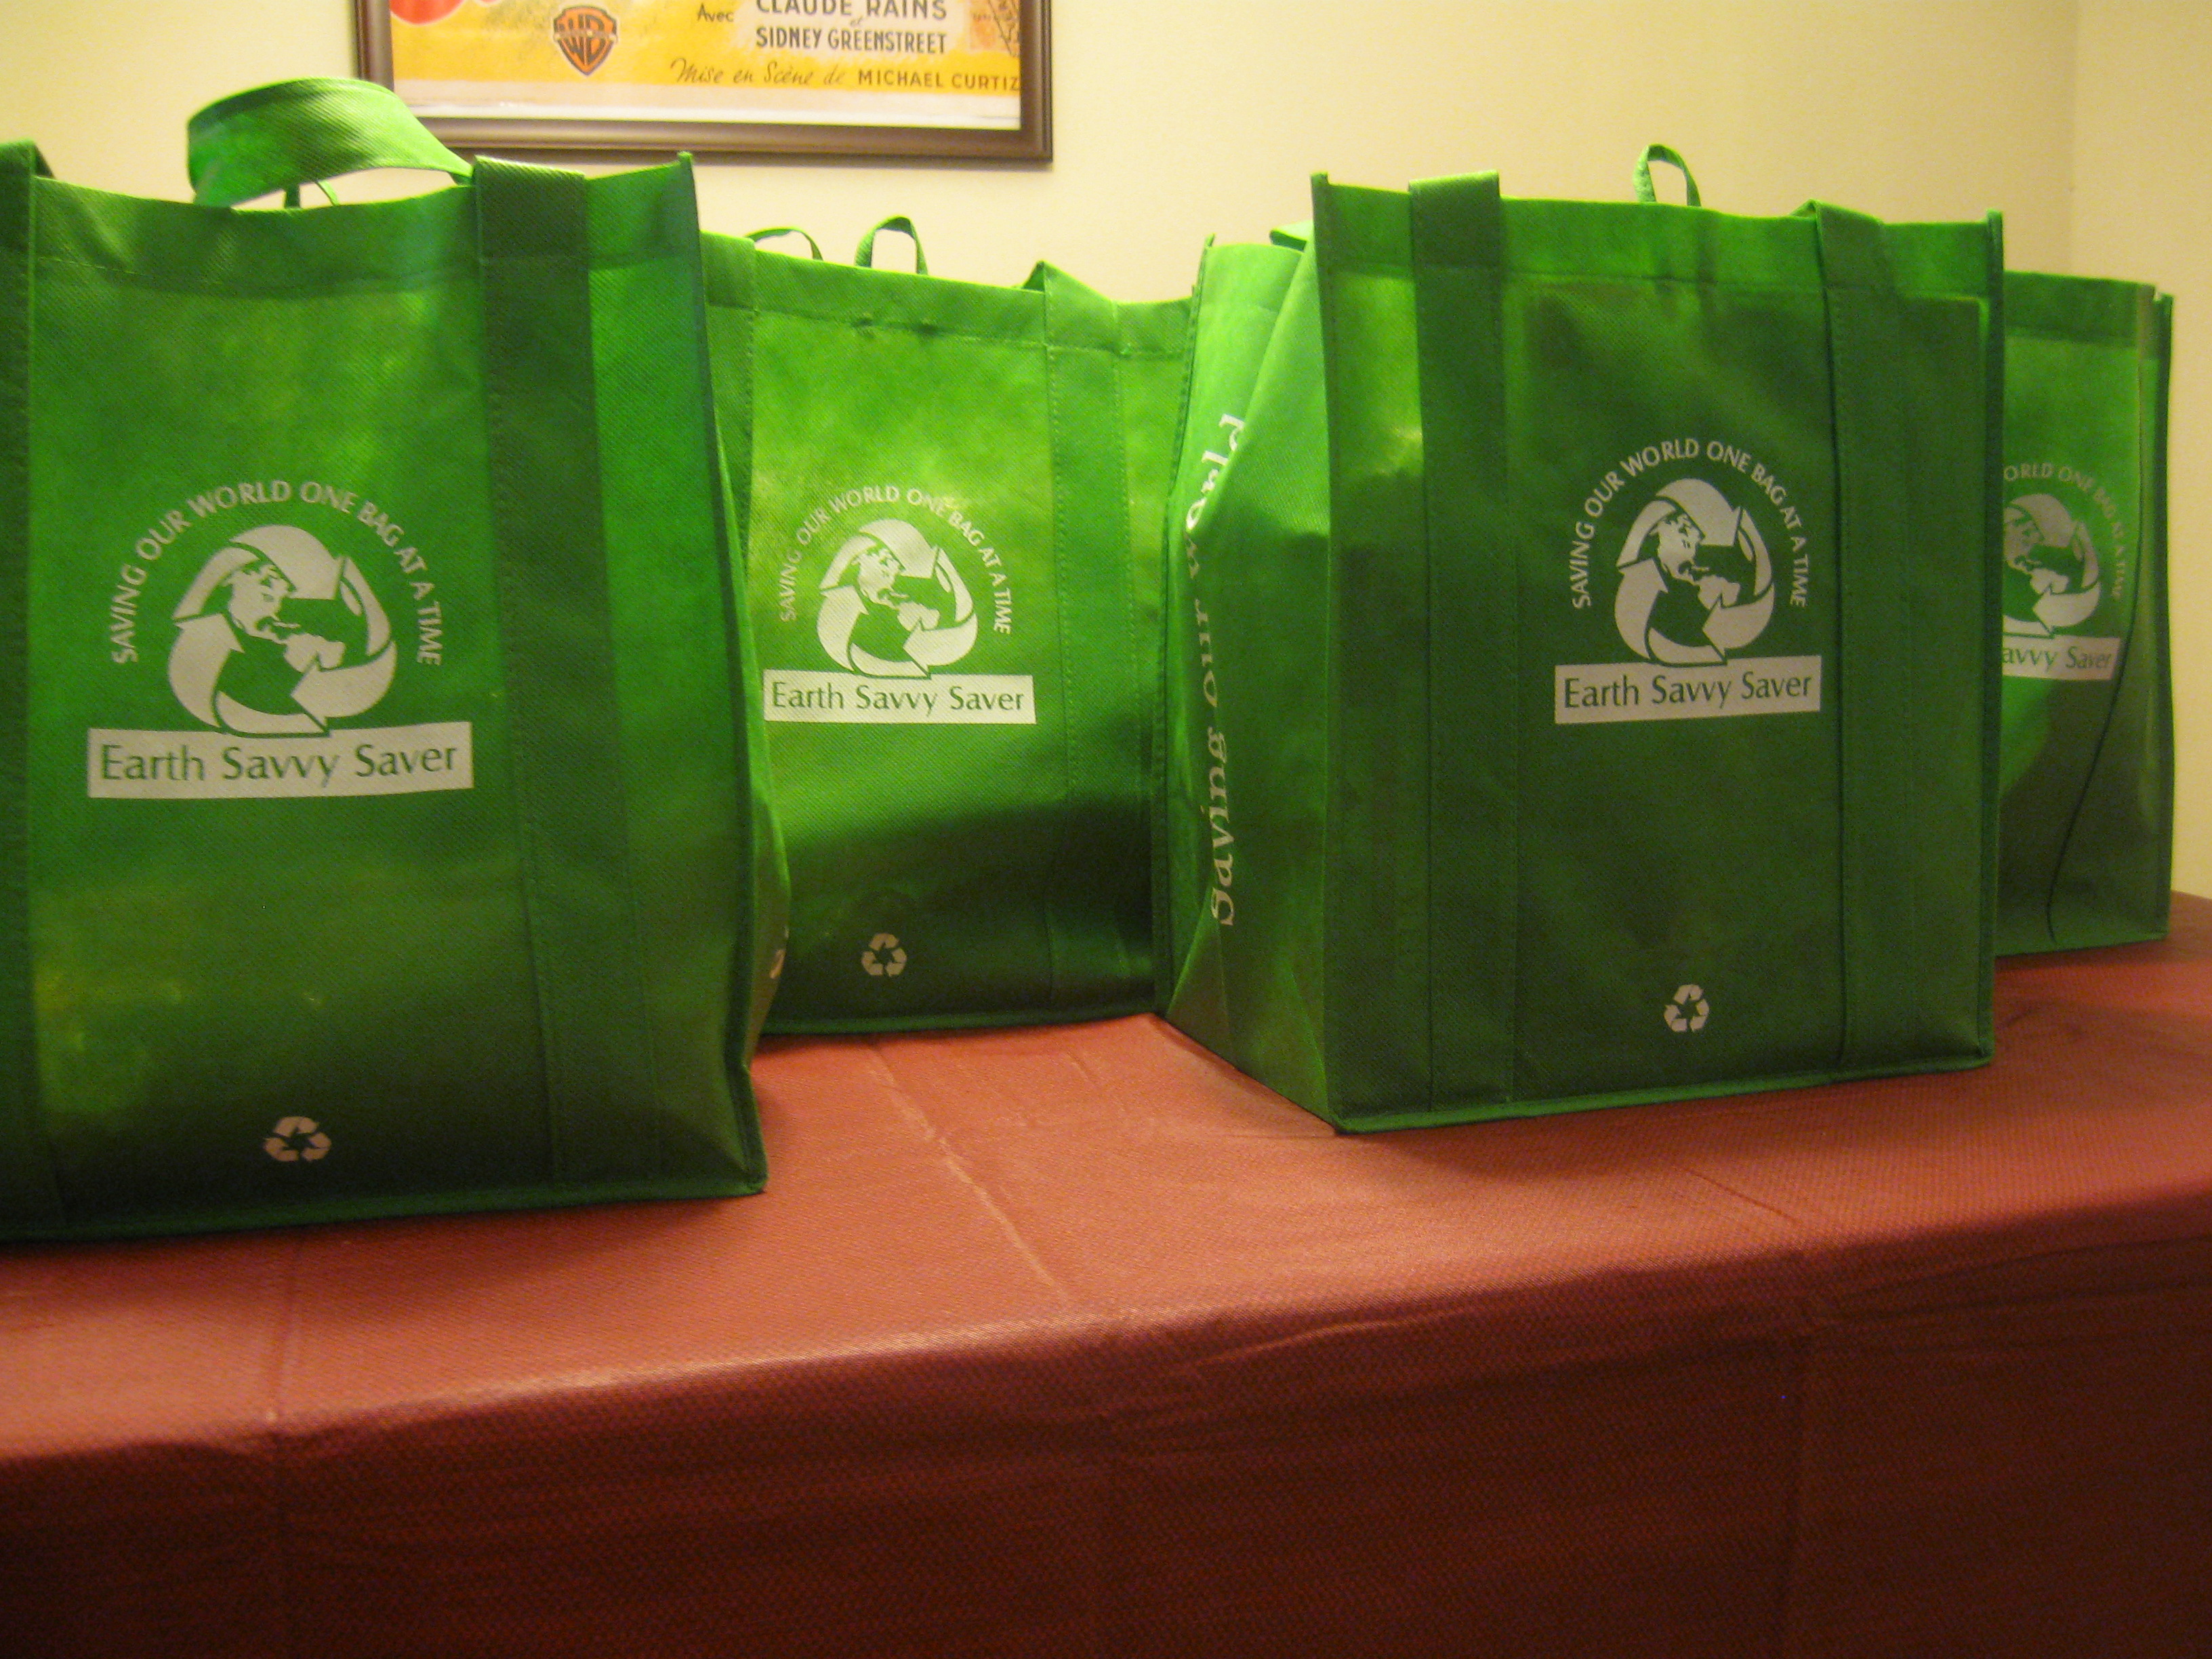
Another reason for our high grocery costs? We finally picked up some reusable shopping bags. They were on sale for 99 cents each, and I really liked the size and stability of these bags. I’ve been keeping an eye out for affordable, good quality reusable bags for some time now.

We’ve tried to reuse the plastic bags, but our cabinet has become overrun with them at this point. They’re too flimsy to make it through more than a couple shopping trips, and other household uses just don’t use them up quickly enough. We’re just not using them as quickly as they’re accumulating. Overall, this is better for the environment and it’ll cut down our kitchen clutter.

Here’s a picture:

Aren’t they cute? They hold an amazing amount of food. One of these cloth bags holds about as much as three or four plastic bags, which makes it much easier to juggle our groceries when we carry them inside.

Obviously, they’re capable of holding much more weight than plastic bags, too. We bought five, but really could have fit everything this week into three. It’s good to have a couple extra, though, for bigger shopping weeks.

The soft cloth handles also make it much more comfortable to carry our groceries up three flights of stairs. Those plastic bags can be so painful when they cut into your hands, and I’m always terrified they’re going to rip!

We’ve seen similar reusable bags at the other grocery store where we shop, but they have the store’s logo plastered all over them. I didn’t like the idea of becoming a walking advertisement for the store. I liked that these have a generic logo.

Obviously I highly recommend that you go out and buy yourself some bags like these. Honestly, I bought them because I wanted to cut down our clutter and plastic waste, but they ended up making it so much easier to carry our groceries. Not only that, but we feel really good about the environmental benefits of reusable bags.

They’re now tucked away in the trunk of our car so we’ll have them on hand for the next shopping trip. Yay!

And now on to our menu plan for the week:

Sunday: Oven roasted chicken and potatoes
Monday: Chicken noodle soup
Tuesday: Leftovers/sandwiches
Wednesday: Chicken quesadillas
Thursday: Spaghetti with meatless marinara
Friday: Homemade pizza

Check out OrgJunkie for more menu plans!

Subscribe

Feeling down? Don’t let it tempt you to overspend (or overeat)

It’s just been one of those weeks. Everything is just … blah. Nothing in particular, really. Maybe it’s because it’s my first full week back after a short vacation. Maybe it’s because I’m feeling deprived of fall in the 85-degree heat. Most likely I’m just more than a little homesick for the beautiful Midwestern fall weather and for my friends and family back home.

At any rate, I’ve been feeling down in the dumps.

Usually when I’m down, the first thing I reach for is something extremely bad for me to eat. Chocolate. French fries. Pizza. Whatever. But I’m watching what I eat now, so that’s not really an option.

Instead, I was craving seared tuna. A downtown restaurant makes a delicious seared tuna that I found myself thinking about as the afternoon wore on. It seemed like the perfect comfort food. I was so tempted to call my husband after work and tell him to forget about the meal we’d planned (roasted chicken breasts) and take me out to dinner.

But we’re already cutting it close with our grocery budget for the month. And honestly, overspending or overeating never really make me feel better when I’m down. Sure, it’s great temporarily, but when the meal is over and the bill arrives, I feel sick — not just because I’ve probably eaten too much and wrecked a week of dieting, but also because it’s extra money we shouldn’t have spent.

It never fails. I feel worse than I did before the meal.

Instead, I called my husband and asked him to start thinking about how we might recreate the seared tuna recipe. On my way home, he gave me a very short grocery list. Basically tuna and rice. We had the rest of the ingredients on hand.

For about $10, we made our own seared tuna at home. It was absolutely delicious and completely satisfied the craving. The chicken breast that we defrosted in the refrigerator last night will be just as good for another meal early next week.

The money we spent will fit easily in our entertainment budget for which we allow about $12.50 a week. No big deal this weekend since we’re going to a work-related picnic Saturday that won’t cost us a dime.

After a healthful, delicious meal I’m feeling better, and I didn’t have to break my diet or my budget.

Menu Plan Monday & Grocery Round Up: 10/11-10/17

Is it really the middle of October already? Wow.

We had a great week at the grocery store, which is good for us considering that this week has completely blown our food budget. We’re going to have to keep things tight at the grocery store for the rest of the month to reduce the impact.

This week we stayed within budget with a total of about $56. That includes five pounds of chicken bought at the lowest price I’ve seen per pound at any of our grocery stores ($1.99/lb). As I’ve said before, we use a lot of chicken, so we like to stock up with a few pounds when it’s on sale at that price. I was expecting the bulk chicken purchase to put us over $60 for the week. It didn’t. Yay!

I’m in the mood for some fall cooking this week, so we’re trying a couple of hearty meals. We’re combining these new fall recipes with some old, inexpensive standbys to keep our meals simple and our costs lower. Here’s our menu plan for the week:

Saturday: Homemade pizza (We’re having it tonight instead of yesterday because we went out to eat for my birthday last night.)
Sunday: Turkey meatloaf and mashed potatoes
Monday: Pasta with butternut squash
Tuesday: Sandwiches/leftovers
Wednesday: BLTs with oven fries

Thursday: Herb roasted chicken breasts & roasted potatoes
Friday: Homemade pizza

I’m excited to try the turkey meatloaf and butternut squash pasta! I’ll let you know how it turns out!

Now head over to OrgJunkie for more meal plan inspiration!

Preparing your kitchen before you leave for vacation

Photo by betsyjean79

In the mad dash to finish packing, make sure nothing is forgotten, and get out the door, it can be easy to overlook some important aspects of travel preparation, including thorough cleaning of your home.

I usually try to thoroughly clean every room before I leave, not only because it’s nice to come back to a clean house after vacation, but also because it allows me to ensure that I haven’t forgotten anything.

If you’re short on time, the one room you should never overlook is the kitchen. Here’s a short list of how I prepare my kitchen before I leave.

1. Plan ahead to avoid leaving a fully stocked freezer behind.

Because I stockpile meat, it’s not uncommon for me to have $40 or $50 worth of food in the freezer at any given time. I don’t like leaving this kind of investment behind when I’m leaving town. If the power went out while we were away, not only would we lose all that meat, but we’d come home to a stinky, unsanitary mess.

To avoid the unthinkable, I spend the weeks leading up to a vacation clearing out my meat stockpile. I stop buying bulk meat for a month or so before vacation, and start using it up in meals. Since we rarely leave town, this is relatively easy for us to do.

2. Clean out the refrigerator before you go.

Try to use as much of your food as possible to avoid waste, and leave your refrigerator free of perishable foods. We usually remove all leftovers and anything that will expire before we return. You don’t want to come home to a smelly refrigerator.

Condiments with a long shelf life like ketchup and mustard are fine to leave. Items like milk, cheese, and eggs should probably go depending on how long you’ll be gone. A power outage may be unlikely, but do you really want to risk having to clean up that kind of mess? Spoiled dairy can leave your refrigerator smelly forever.

3. Don’t leave unsealed food on the counters, in the pantry, or in the sink.

This is particularly important in the warm summer months. When we’re leaving town, we typically shut off the AC so we’re not paying to cool an empty apartment. If you’re going to do this, it’s essential that you completely clear your kitchen of any unsealed food items or fruit to avoid bugs.

Make sure items like sugar are sealed up in airtight containers. If you have open containers of crackers, cookies, bread, or other foods, you should eat them, take them with you, or throw them away before you leave. If it’s sealed airtight, it should be safe. Otherwise, don’t leave it in your kitchen.

Make sure all garbage cans and recycling bins are empty and clean. I also run my garbage disposal one last time and pour some bleach or other cleaning solution down it before I leave. I learned this lesson the hard way in college when I returned home after a weekend away to find a rotten piece of watermelon in the garbage disposal and a kitchen full of fruit flies. We didn’t get rid of them until fall when the weather cooled down. It was a nightmare.

4. Make sure all dishes are clean, dry, and put away.

Dirty dishes, standing water and warm temperatures can lead to mold and bacteria. Not to mention, nobody likes to come home to a sink full of dishes to put away or, worse, wash. I always do one last load of dishes the night before I leave, dry them, and put them away. I wash any last-minute dinner or breakfast dishes by hand, dry and put those away, too. Don’t leave any dishes, dirty or clean, in your dishwasher.

5. Unplug everything but the refrigerator and the oven.

Appliances like toaster ovens, blenders, and stand mixers are not only fire hazards when left plugged in unattended, they also drain extra energy. If you unplug everything before you go, your kitchen will be safer while you’re gone and you’ll be pleasantly surprised by a lower electric bill upon your return.

Clean out the refrigerator before you put away your groceries

Have you ever found leftovers shoved in the back of the refrigerator and forgotten for weeks? Um, me neither. OK, so I have. But not for a very long time, because we have a simple system for clearing out the old stuff these days.

Every week before we go to the grocery store, we clean out the refrigerator. We check all expiration dates, get rid of uneaten leftovers from the week before, and make room for the new groceries.

Not only does this ensure the removal of dated food, it also eases the process of putting groceries away when we return from the grocery store. Because we’ve already shifted and organized everything, it’s easy to fit all of the week’s groceries. It’s also a good opportunity to take stock of your freezer and condiment inventory and make additions to the grocery list if necessary.

Putting away groceries is a lot less stressful when we’re not trying to make space in the refrigerator at the same time.

Looking for more kitchen organization ideas? Check out this week’s Works for Me Wednesday carnival at Rocks in my Dryer.

Menu Plan & Grocery Round Up: 9/27-10/3

My menu plan and grocery round up are a little late this week. We opted to skip the grocery yesterday for Tony’s birthday.

Our grand total this week was $42 and some change! Looks like we had a phenomenal week, huh? Well, not so fast.

We’re leaving town to visit my sister in Seattle on Friday, so we only needed to buy groceries for 6 days this week.

Based on our $50/week grocery budget, we spend roughly $7 a day for groceries. That means our $42 bill was dead on with our budget. Great, but not as great as going $8 under budget would be. :)

Since we’re preparing for our short vacation, we decided to keep our menu very simple this week. We’re also trying to use up some of our pantry staples.

Here’s our menu plan for the shortened week:

Saturday: Monthly restaurant meal (and Tony’s birthday dinner! :))
Sunday: Herb roasted chicken breasts with green beans and mashed red potatoes (see recipe below)
Monday: Whole wheat penne with garlic herb marinara
Tuesday: Sandwiches/leftovers
Wednesday: Whole wheat spaghetti with pesto
Thursday: Homemade pizza
Friday: Dinner with my sister and my parents in Seattle!

Herb roasted chicken breasts and red potatoes

4 boneless, skinless chicken breasts
2 tsp. dried rosemary
2 tsp. dried thyme
1 tsp. kosher salt
1/2 tsp. ground pepper
1 clove minced garlic
2 tbsp. olive oil

Combine seasonings with olive oil in small bowl. Spread liberally onto chicken breasts. Cut red potatoes into fourths. Coat in olive oil, and season liberally in salt and pepper. Surround chicken breasts with one layer of potatoes in roasting pan. Roast in 375-degree oven for 30 minutes or until chicken is cooked through and juices run clear.

Now head over to OrgJunkie for more menu plans!

Menu Plan Monday & Grocery Round up: 9/20-9/26

This week was not as successful as last. Our grand total was $68! Bummer.

We’re entertaining some guests tonight, so a lot of the extra comes from a bigger, fancier than normal spinach lasagna that we’re making tonight. We also had to stock up on some staples like flour, peanut butter and jelly, soy sauce, tea bags and coffee filters.

I know – excuses, excuses. I’m consoling myself by reminding myself that grocery bills like this one have now become the exception instead of the rule. We’ve been within budget for the past three weeks, so I’m willing to cut myself some slack for going over.

Here’s our menu plan for the week:

Saturday: Spinach and four-cheese lasagna with salad and fresh garlic bread
Sunday: Roasted chicken with potatoes and green beans
Monday: Chicken quesadillas with refried beans
Tuesday: Leftovers/Sandwiches
Wednesday: French dip sandwiches
Thursday: Chinese style chicken and broccoli
Friday: Homemade pizza

As part of Menu Plan Monday’s Family Favorite edition, I’m also posting a recipe that’s been passed down from my mom. Her classic lasagna includes meat sauce, but we’ve adapted the recipe to be meat-free. It’s delicious. Hope you enjoy!

Spinach Lasagna

Classic Marinara Sauce:
1/2 of an onion, chopped
3 cloves of garlic, minced
1 (14.5-ounce) can of diced tomatoes
1 (14.5-ounce) can of tomato sauce
1 (5- to 6-ounce) can of tomato paste
2 tablespoons of parsley
¼ teaspoon of sugar
¼ teaspoon of kosher salt
1 teaspoon of dried basil
½ cup of red wine

Cheese Filling:
3 cups of ricotta cheese
½ cup of Parmesan cheese
1 tablespoon of parsley
1 teaspoon of oregano
1 package of frozen spinach, thawed and pressed to remove excess water

1lb. lasagna noodles
8 oz. shredded mozzarella cheese
1/2 cup Parmesan cheese for sprinkling

Saute onions and garlic in 1 tbsp. olive oil. Add diced tomatoes, tomato sauce, tomato paste, parsley, salt, and basil. Stir until tomato paste is blended into sauce. Bring to a slight boil. Add red wine. Reduce heat, and simmer for 30 minutes.

In a large bowl, combine ricotta cheese, Parmesan cheese, parsley, and oregano.

Thaw spinach in a microwave or stove top. When it’s cool enough to handle, put it in a clean kitchen towel and squeeze to remove excess water. Incorporate into ricotta cheese mixture.

Boil lasagna noodles for 10-15 minutes according to instructions on packaging.

Build lasagna in an 8×8 pan beginning with a small layer of sauce to avoid sticking. Lay down noodles with no gaps followed by cheese filling, sauce, mozzarella cheese, and Parmesan cheese. Repeat twice for a total of three layers. Top with a layer of sauce, mozzarella cheese, and Parmesan cheese.

Bake at 350 degrees for 30-45 minutes until cheese is bubbly and beginning to brown. Allow to cool for 15 minutes before serving.

Serves 4-6 people.

If you’d like to make this recipe my mom’s way (with ground beef), just add beef to the onion and garlic and cook it completely before adding the tomato sauce. She also uses cottage cheese instead of ricotta. It’s saltier, and may be a bigger hit with the kiddies.

Keep in mind, this recipe is three in one. The marinara sauce is absolutely divine on spaghetti, and the cheese filling is perfect for stuffed manicotti. Mix it up to maximize your meals!

Check out OrgJunkie for more meal plan inspiration!

Life without a microwave

Yesterday, Kelly at Almost Frugal Food wrote a post about heating and reheating food without a microwave. Like Kelly, I don’t have a microwave, and I don’t want one. So I thought I’d throw in my two cents and tips on the topic.

Cutting the microwave out of your life is a great way to improve your diet. My husband used to live predominantly on microwaveable food in college. Generally, the stuff is pretty bad for you.

Cooking without a microwave is also better for your budget. Convenience foods, which come complete with high-tech packaging designed to make them taste less like microwaved food, are also a drain on the budget. Cooking with whole foods from scratch is much more economical than packaged convenience foods designed for microwave cooking.

I’ve also just never been completely comfortable with the idea of microwaves, to be honest. The idea of toxins and carcinogens being released by heating plastic in the microwave is more than a little disconcerting. Am I being paranoid? Probably. But I can live with that.

The bigger issue is that I hate the way food tastes when it’s heated or reheated in a microwave. It always comes out with a chewy, dry consistency. For the longest time I thought I hated leftover pizza. Turns out I just hated the way it tasted when it was reheated in a microwave.

Many people react with shock and horror when I tell them I don’t have a microwave. “How do you reheat anything?!” It’s like the entire fabric of their universe is crashing down on them.

I’ve never understood why people are so horrified by the idea of life without a microwave. The truth is, there’s nothing a microwave can do that a stove top or conventional oven can’t do better. It takes a little more time, but the tastier results are worthwhile.

Soups and pastas can be reheated simply by throwing them into a pot or skillet over medium-low heat on the stove top. Pizza, casseroles, and lasagna can be reheated for 10-20 minutes in a 300-350 degree oven.

Need to defrost meat? Refer to your menu plan before you go to bed, and place the meat you’ll need for tomorrow’s dinner into the refrigerator to thaw for 24 hours. Forgot to take your chicken breast out of the freezer last night? It happens. Just put it in a bowl in the sink with slow, steady stream of cool water trickling into the bowl. It’ll thaw in about 20 minutes.

The only thing we can’t make is microwave popcorn. No big deal. We buy stove top Jiffy Pop. It’s more fun anyway. :)

Subscribe