Tag Archives: recipes

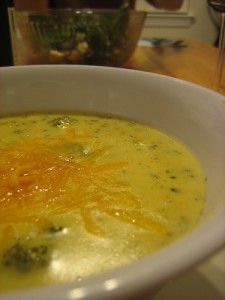
Better than Panera broccoli cheddar soup

I’m back on the fitness train, so it will be a long time before I can enjoy this particular recipe again. But that’s no reason I can’t share it with you!

I am an absolute fanatic for broccoli cheddar soup, and this experiment started when we attempted to recreate Panera’s version. This is a blend of a lot of different versions that we’ve found through various sources. The following directions, tips, and tricks are written by Tony since he’d got a lot to say on the subject.

Broccoli Cheddar soup

I’ve tried to make this many different ways, and through all of the incarnations, I’ve learned a thing or two about this recipe. First, you really have to use a light-colored stock; darker stocks alter the flavor too profoundly and make it difficult to attain that cheddar-y color. Second, shredding the carrots instead of dicing or doing a juilenne helps with time and consistency. Third, the stock and dairy should be in equal proportion. Fourth, cut the broccoli (a food processor just demolishes it and turns the soup a greenish hue) and cook it in pieces separately, then fold in; the soup never gets hot enough to cook the broccoli fully. Fifth, anything less fattening than whole milk isn’t worth it.

  • 1/2 medium onion, diced
  • 4 tablespoons melted butter
  • 1/4 cup flour
  • 2 cups half-and-half (or whole milk)
  • 2 cups light stock (chicken or vegetable)
  • 1/2 pound (or more) fresh broccoli florets
  • 1 cup carrots, peeled and shredded
  • salt and pepper, to taste
  • 8 to 16 ounces grated sharp cheddar cheese

Cut the broccoli into small pieces, no more than 1/2 inch in diameter. Bring a small pot of water to a boil, add salt, and cook the broccoli until it is bright green and soft, approximately 5 minutes.

Dice the onion and saute in the melted butter until translucent. Add the carrots and cook until the carrots have softened.

Whisk in the flour and cook for 3 to 5 minutes over low heat, just until all the flour has been absorbed by the butter and the mixture has thickened. Pour in the stock and dairy, and simmer until the liquid is thick enough to coat the back of a spoon.

Once the soup is thickened, stir in the cheese one small handful at a time. Drain the broccoli and stir it into the soup. Serve with crusty bread.

Photo credit

Super simple slow cooker hot beef sandwiches

This recipe comes from my parents. I’m not sure if it was originally devised by my mom or dad or if they picked it up from someplace else, but I know they’ve been making it on Sundays for years. With just five main ingredients, it couldn’t be simpler, and it’s really delicious. Perfect football food (not that I watch football).

  • Large, inexpensive cut of beef (a chuck roast or bottom round roast works well)
  • 16 ounce jar of pepperoncinis in vinegar
  • 1 can beef broth
  • 1 onion
  • 2 cloves garlic
  • Salt and pepper to taste

Roughly chop the onion and smash the garlic. Then just throw everything into the slow cooker and simmer on low for 6-8 hours. When you’re ready to serve, shred the beef with two forks, put it back in the pot with the onions and peppers, and dig in. I like to serve on toasted Kaiser rolls with a slice of melted Provolone cheese.

Photo credit

Thanksgiving menu with recipes

One of the perks of having families on separate sides of the state is that we don’t have to try to cram two dinners into one day on Thanksgiving. Last year, we hosted Tony’s family for a meal the week before Thanksgiving, and we celebrated with my family on Thanksgiving day. This year, it’s reversed. Either way, we’re having Thanksgiving two weeks in a row! It works out, because Thanksgiving is pretty much my favorite holiday.

Tony makes a pretty incredible Thanksgiving dinner, and we’ve gathered these recipes from various sources since we met and started celebrating Thanksgiving together. We’ve always cooked our own meal on another day, even on the days when we celebrated Thanksgiving day with our families. The turkey, gravy, and pie are new recipes that we’ve never tried. I’ll let you know how they turn out, but I’m sure it will be marvelous.

What are your favorite Thanksgiving recipes?

Photo credit

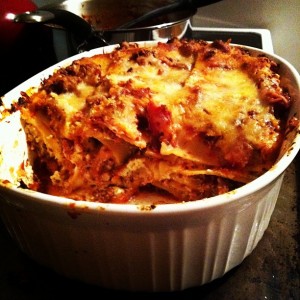
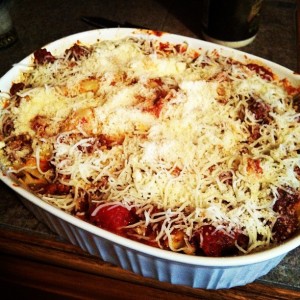
Lasagna with old-fashioned marinara sauce

This is one of the only recipes that I prefer to cook instead of Tony. The recipe came from my mom. It was my favorite meal when I was a kid, and it’s one of the first things I ever learned to cook, so I have a lot of fun making it myself.

It’s not difficult, but it’s time consuming and a lot of work, so I usually only make it for special occasions or dinner guests. It’s worth the work, though! It’s still one of my favorite meals.

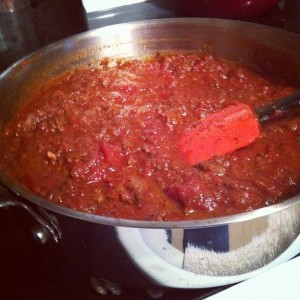
The marinara sauce is delicious on its own, and you can use it for ordinary spaghetti or other pasta dishes. I hope you enjoy it as much as I do!

Lasagna with old-fashioned marinara sauce

Classic Marinara Sauce

  • 1 lb. ground beef
  • 1 small onion, chopped
  • 3 cloves of garlic, minced
  • 1 (14.5-oz) can of diced tomatoes
  • 1 (14.5-oz) can of tomato sauce
  • 1 (5- to 6-oz) can of tomato paste
  • 2 Tbsp. of parsley
  • ¼ tsp. of sugar
  • ¼ tsp. of kosher salt
  • 1 tsp. of dried basil
  • ½ cup of red wine

Cheese Filling

  • 3 cups of ricotta cheese
  • ½ cup of Parmesan cheese
  • 1 Tbsp. of parsley
  • 1 tsp. of oregano
  • 1lb. lasagna noodles
  • 8 oz. shredded mozzarella cheese
  • 1/2 cup Parmesan cheese for sprinkling

Cook ground beef in a large skillet with a pinch of salt and pepper until browned. Drain all but a tablespoon of the fat. Add onion and garlic and saute in skillet with ground beef until soft. Add diced tomatoes, tomato sauce, tomato paste, parsley, salt, and basil. Stir until tomato paste is blended into sauce. Bring to a slight boil. Add red wine. Reduce heat, and simmer for 30 minutes.

In a large bowl, combine ricotta cheese, Parmesan cheese, parsley, and oregano. Boil lasagna noodles for 10-15 minutes according to instructions on packaging.

Build lasagna in a deep casserole dish beginning with a small layer of sauce to avoid sticking. Lay down noodles with no gaps followed by cheese filling, sauce, mozzarella cheese, and Parmesan cheese. Repeat twice for a total of three layers. Top with a layer of sauce, mozzarella cheese, and Parmesan cheese.

Bake at 350 degrees for 30-45 minutes until cheese is bubbly and beginning to brown. Allow to cool for 15 minutes before serving.

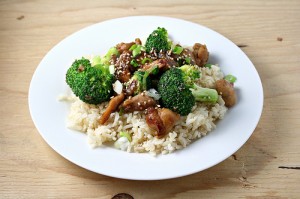
Chicken and broccoli stir fry

Every once in a while, I get a craving for Chinese food. What I do not crave, however, is the MSG and other generally yucky stuff in Chinese takeout. I’d also prefer not to spend a third of our weekly grocery budget on one meal.

We found this recipe one night when I was craving Chinese, and it’s since been added to our regular meal rotation. We modified it to cut out some of the pricier ingredients. It seems like a long list, but most of these ingredients are things we keep around the house anyway. Since it requires such a small amount of Hoisin, a single bottle (purchased from the international food aisle in the grocery store for around $3) can be used for several different meals.

This homemade version is healthier than Chinese takeout, and even more delicious. Enjoy!

Chicken and broccoli stir fry

  • 2 chicken breasts
  • 1 bunch of broccoli
  • 2 cloves of garlic, minced
  • 1-inch of ginger, peeled and minced
  • 1 Tbsp. corn starch
  • 2 Tsp. hoisin sauce
  • 2 Tbsp. low-sodium soy sauce, plus more for marinating
  • ½ cup vegetable stock (or water)
  • ½ tsp. crushed red pepper flake (adjust for taste)
  • 2 Tbsp. vegetable oil
  • Salt & freshly cracked black pepper
  • 1 ½ tsp. brown sugar (optional)
  • Sesame seeds (optional)

Cut the chicken into cubes and marinate in a small portion of soy sauce (approximately 2 Tbsp). Set aside. Chop the broccoli into bite-sized florets, then peel the stems, cutting the stems into half-moons. Stir together the corn starch, vegetable stock, soy sauce, hoisin, red pepper flake, and brown sugar.

Heat 1 Tbsp. of vegetable oil in the bottom of a wide skillet or wok. Put the chicken into the skillet, sprinkle with black pepper, and cook until entirely done. Remove from the skillet and set aside.

Add the other 1 Tbsp. of vegetable oil if necessary and sauté the broccoli, stirring constantly. When the broccoli begins to turn bright green, add the garlic and ginger. Continue stirring until the broccoli is slightly softened, bon’t overcook the broccoli or allow the garlic to burn. Remove from the skillet and set aside.

Add the sauce to the skillet and allow it to come to a simmer. Once the sauce is thickened, stir in the broccoli and chicken and cover in the sauce. Sprinkle with sesame seeds and serve over rice.

Photo credit

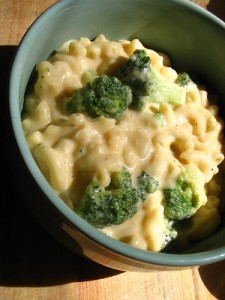
What’s Cookin’ Wednesday: Broccoli and cauliflower mac and cheese

This is one of our favorite go-to comfort food recipes. Who doesn’t love homemade macaroni and cheese? While adding fresh vegetables to the dish doesn’t counteract the butter, cheese, and whole milk, it does add lots of nutrients and flavor, and it’s a great way to sneak some veggies into a picky kid’s diet.

This recipe was originally inspired by a very similar recipe for cauliflower mac and cheese from Real Simple. Tony simplified it a little, and fattened it up for flavor, but you could easily use reduced fat cheese and 1% milk to make it a little healthier.

Broccoli and cauliflower mac and cheese

  • 12 oz. macaroni (or another short tube pasta)
  • 1 head of cauliflower
  • 1 bunch of broccoli
  • 4 Tbsp. unsalted butter
  • 1/4 cup all-purpose flour
  • 1 cup whole milk
  • A pinch of grated nutmeg
  • 8 ounces of sharp cheddar, shredded
  • 1/4 cup bread crumbs or Panko
  • 1/4 cup grated Parmesan cheese
  • 1 Tbsp. dried parsley
  • Kosher salt and fresh ground black pepper

Bring a gallon of water to boil over high heat in a large pot as you cut the cauliflower and broccoli into florets. Generously salt the water once it has reached a boil.

In a medium-sized saucepan, melt the butter over medium heat. When the butter is melted, pour in the flour and stir until it and the butter form a roux (a thick paste). Add the milk slowly, stirring regularly. Allow the mixture to come to a simmer. Sprinkle in the pinch of nutmeg. Once the liquid has become thick and creamy, lower the heat. Stir in the cheese one handful at a time.

Cook the pasta in the boiling water until it is close to al dente. Add the broccoli and cauliflower to the boiling pasta and stir them all together. Let the vegetables boil with the pasta for two to three minutes, or until the broccoli has turned bright green and the cauliflower has begun to soften. Strain everything into a colander.

Place the pasta and vegetables back into the pot, pour in the cheese sauce, and stir to combine. Add plenty of black pepper. Transfer to a large casserole or baking dish. Top with the bread crumbs, parsley, and Parmesan.

Bake in a 350-degree oven for 20 minutes. Let it rest for 5 to 10 minutes before serving.

Photo credit

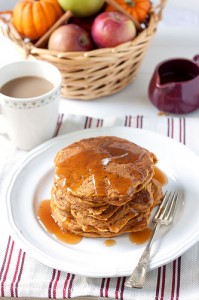
What’s Cookin’ Wednesday – Apple Cider Pancakes

If you’re a regular reader of my blog, then you know my husband is the cook in our house. It’s not that I can’t cook; I know my way around the kitchen. It’s just that my husband is a more inventive and more accomplished cook, and since it’s something he enjoys doing, he cooks dinner 95% of the time. It’s okay with me, because one less thing, right? I enjoy baking every now and then when I get an itch to do some mixing.

I recently decided that keeping all of his delicious concoctions to myself is a crime. So I’ve decided to share some of his recipes with all of you. I do the menu planning, so I usually find a recipe that looks good, and then Tony adapts it however he sees fit. Sometimes the end result doesn’t look a lot like the recipe that inspired it, but it’s always delicious. Sometimes he throws things together completely from his own imagination.

So I’m going to start sharing recipes on Wednesdays. I may not have something to share every week, though I’m going to try. I also promise to start working on my food photography so I can share my own photos instead of other people’s Flickr photos of similar meals. If you have any questions or comments to chime in, please do! In the future, I may figure out how to do a Mr. Linky thing, though I imagine the last thing the Internet needs is another recipe link-up.

Without further ado, here’s the first recipe. Pancakes are a long tradition in our house. Tony makes them almost every weekend. Sometimes he gets a little bored with his tried and true buttermilk pancake recipe, and he adds things to the batter to mix things up. Last weekend, he stumbled on a smash hit that’s perfect for a chilly fall morning. I hope you enjoy it as much as we did!

Apple Cider Pancakes

  • 1 ½ cups all-purpose flour
  • 2 Tbsp. brown sugar
  • 1 Tbsp. baking powder
  • 1 tsp. salt
  • 2 tsp. cinnamon
  • 1 cup milk
  • 1 egg, lightly beaten
  • ¼ cup apple cider
  • 1 tsp. pure vanilla extract
  • Sweet apple, peeled and grated (1 large or 2 small)
  • 2 Tbsp. melted butter

Directions

Combine flour, sugar, baking powder, salt, and cinnamon in a large bowl. Set aside. In a separate bowl, combine milk, apple cider, egg, and vanilla. Pour wet ingredients into dry ingredients. Add grated apple, and mix everything until just combined, but don’t over-stir.

Melt butter in a non-stick skillet. Pour melted butter into batter, leaving a small amount in the pan. Cook pancakes until golden brown on both sides. Serve hot with warm maple syrup and a glass of apple cider.

Photo credit

Photo credit

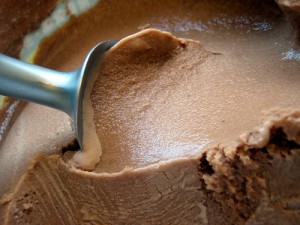
Dairy-free coconut milk ice cream (you won’t even miss the dairy, I promise)

Summertime = ice cream. Obviously. So now that summer is here, and Judah still doesn’t seem to be tolerating dairy in my diet, I was understandably bummed about it.

I looked at the “ice cream alternatives” in the grocery store — there are soy, rice, almond, and coconut milk varieties — but I sort of dragged my feet about trying them. I viewed them the same way I view “dairy-free” cheese. What’s the point? If it’s only going to remind me how much I want the real thing, then I might as well just skip it.

After some cajoling from Tony, I finally agreed to try coconut milk ice cream. No dairy. No soy. Still pretty high in fat and calories, so you can’t eat a pint every night without putting some junk in your trunk, but it’s okay as an occasional treat.

I tried it, and I FELL IN LOVE. Coconut milk ice cream is absolutely delicious. I didn’t miss the dairy at all. It tasted rich and smooth just like real ice cream, and the slight hint of coconut flavor just made it all the more delicious — and I’ve never been a huge fan of coconut in large quantities.

The only problem? Coconut milk ice cream is not frugal. Not even a little bit. We can usually get two quarts of premium ice cream for $2.50. A pint of coconut milk ice cream will cost you at least double that, and usually closer to $6. For a single pint.

Because my husband is a saint — and because he missed ice cream, too, but didn’t dare try to eat it in front of me — he found this recipe for chocolate coconut milk ice cream. We made a few alterations to make it more affordable (agave syrup may be healthy, but it’s pricey). Here is our version of the recipe:

Chocolate Coconut Milk Ice Cream

3 cups of unsweetened coconut milk (two cans)
2/3 cup of cocoa powder
8 tablespoons simple syrup
1 teaspoon vanilla extract
6 tablespoons brewed coffee, cold

Mix ingredients together until smooth. Cover and refrigerate overnight. Add cold coffee. Follow your ice cream maker’s instructions to turn the mixture into ice cream. Serve immediately as “soft serve,” or freeze overnight for firmer ice cream.

We paid about $3 for the coconut milk and pennies for the small amounts of sugar, vanilla extract, and coffee included. It yielded about a quart and a half of coconut milk ice cream for about half the price of a pint in the grocery store. I’m excited to try all kinds of variations on this recipe, including vanilla and coffee flavors and all kinds of mix-ins.

Photo credit

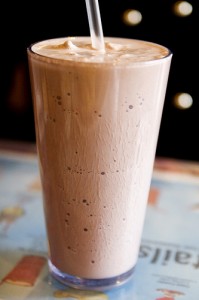
Life-changing chocolate banana smoothie

One of my favorite indulgences is the Starbucks Banana Chocolate Vivanno. Sadly, I no longer live near a Starbucks (probably a good thing since my frequent cravings would lead me to drink lethal amounts of decaf and cost us a fortune).

The good news is I stumbled across this recipe in Real Simple magazine a few months ago. (I can’t find a link, but I know it was in the magazine, maybe in March?). It’s so simple, absolutely delicious, and it tastes just like the Banana Chocolate Vivanno for a fraction of the price.

For two servings:

  • 1 1/2 cups milk
  • 2 tablespoons cocoa powder
  • 1 banana
  • 1 cup ice
  • Blend until smooth.

To really mimic Starbucks, add some coffee or espresso, but you’d have to experiment with the flavor to get it right. Tony and I add vanilla yogurt to thicken it up. You could also add powdered protein or fiber to give it a little more nutritional punch.

I think this may be the official drink of my pregnancy.

Photo by roboppy